I-36 Gadgets & Stuff
This page holds information about the things and systems not essential to every boat. They include the routine and the fun. Where dialog is part of the story, it is included. If you are looking for major, essential item care and maintenance, look on the Maintenance page. We will continue to add information as it is received, so please send your contributions to:
E-mail Webmaster Rick Van Mell
|
Home Page Menu
From: Cliff Cohen
I recently had to replace one of the push button circuit breakers on my 1984 I-36’s distribution panel (I upgraded the dockside battery charger and the 5 amp breaker couldn’t handle the load). Here’s what I learned:
- the breakers are manufactured in Germany by E-T-A Circuit Breakers
- their U.S. division is in Illinois and their contact information is as follows:
E-T-A Circuit Breakers
1551 Bishop Court
Mount Prospect, Illinois 60056-6060
(847) 827-7600
www.etacbe.com
- the breakers are still in production (amazingly) but their numbering system has changed:
Old number: 45-700-SI0-DD (followed by the amp rating)
New number: 2-5700-IG1-K10-DD (followed by the amp rating)
- detailed descriptions and drawings are available on the E-T-A web site
- the breakers are in stock and available for purchase through the following distributors:
Electric Switches
800-421-8855
www.electricswitches.com
Wes-Garde Components
800-554-8866
www.wesgarde.com
Hope this helps someone else
Cliff Cohen, Latitude, I-36 #657
Go To Top
From: JimJoubert@cs.com
Sent: Monday, December 02, 2002 10:28 PM
Subject: Gadgets & Stuff
Mon Ami had rust stains emanating from the shroud/chainplates over to the toe rail. After a lot of cleaning, they would disappear only to show up again in a couple of weeks.
I decided the stains were caused by the morning dew condensing on the shrouds and then running down the shrouds to the deck. These small water droplets were carrying dirt and rust particles across the deck causing the stains.
To solve the problem, I installed small 3X5" kitchen sponges cut in half. Each half was attached to the shroud with plastic cable ties. The sponges soak up the moisture and retain it long enough to dry out during the day. No more stains!
When I hose off the boat it's amazing how much dirt flushes out of those sponges!
The sponges may not be very aesthetic, but they eliminate a lot of extra work. The small sponges with the 3M abrasive pads on one side are less conspicuous. You can cover them with shroud boots as I do, and they are out of sight.
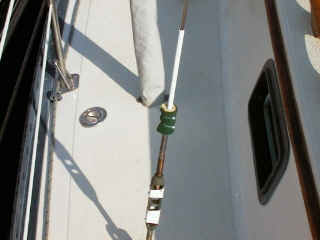 The Rust Stopper. (Click to enlarge.)
Jim Joubert
Go To Top
I-36 Witticisms: (Send yours along to add to the list)
"It was a little windy" (Force 8, 45 knots)
"We almost had a great start" (Version #1 - Caught barging again.)
"We almost had a great start" (Version #2 – Didn’t get away with a port tack start.)
"The crew didn’t get the genny in fast enough" (The Skipper threw a panic tack.)
"It’s kind of shallow over there" (Hard aground for a tide cycle.)
"She's a little tender downwind." (After a windward broach with the pole in the water.)
"We had some moisture problems" (The bulkhead was riddled with dry rot.)
"Not much for happy hour." (Why do I feel like a stuffed hog)
Go To Top
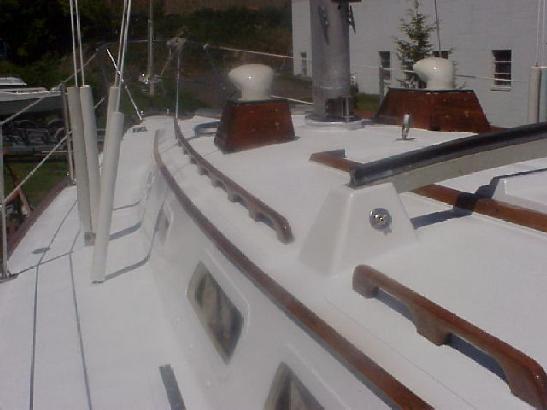
Head & Cabin Vents
There is nothing like fresh air below to help on those long passages, and hot days and nights. Larry Gotch added dorades and a hatch in the head to improve ventilation on Aquarius. The hatch is a
standard Bowmar from Boat/US. It is approximately 12x12. The prior owner had installed large opening ports P/S second "window" aft. Larry removed these
monstrosities and replaced them with Beckson ports of similar size to OEM ports. The dorades were a lucky find at the used boat equipment store. Pay
attention to your overall height on the dorades, especially if you have a solid boom vang. Larry's clear each other, but he used the rubber lo-profile
cowl vents to be safe. Let the Sun Shine In!
Thanks Larry. 5/27/99


Click Pic to enlarge.
Go To Top
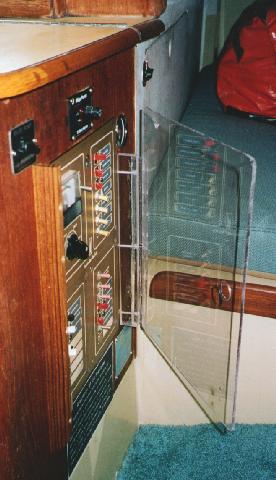
Switch Panel Cover
Don Henderson on Kindred Spirits fixed up this handy rig to protect his switch panel. As he says, "Our qurter berth gets used! Not just for "storage", but for "bunking". The difficulty has been that access to the quarter berth inevitably results in the circuit breakers being turned off (or on) as people get in and out.
Our solution is this lexan cover, stepped out about 1 & 1/4 inches from the panel surface. It is hinged on the aft side with "plastic" spring loaded hinges, with magnetic catches on the forward side matching up to a strip of 1/2 x 1 & 1/4 inch teak with plugged screw holes."

Click Pic to enlarge.
Go To Top
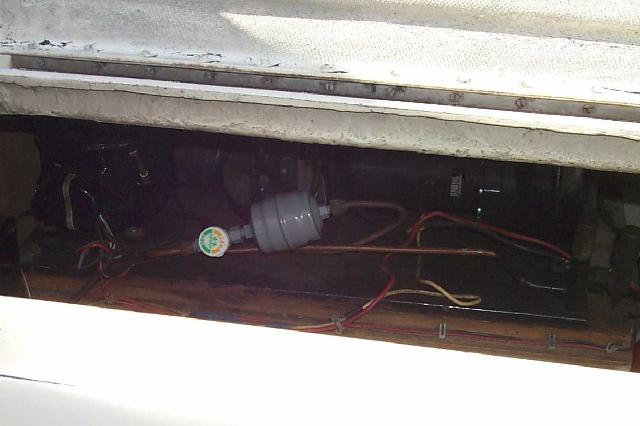
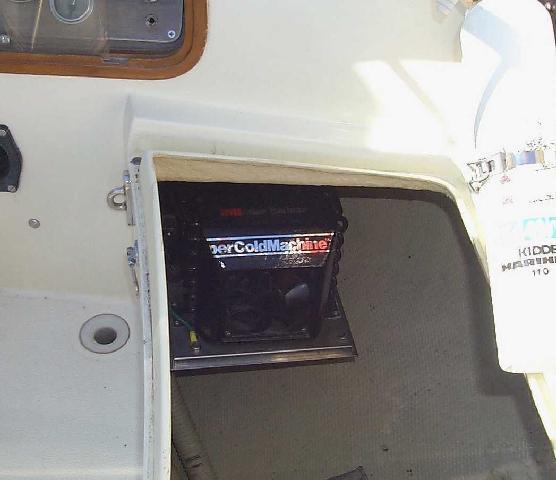
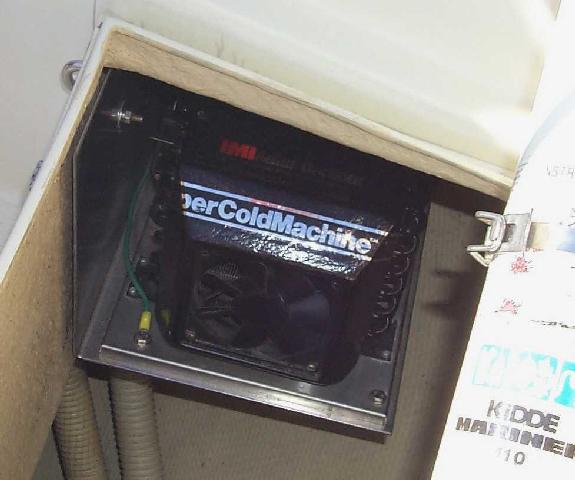
Refrigeration
There are several places people have put the compressor units for refrigeration. The first picture is a 20 year old 110 volt & 12 volt unit on a shelf against the hull in the starboard cockpit locker on Vanishing Animal. The next two are a new compressor Harry Farrell put in the starboard stern lazerette.


Click Pics to enlarge.
Go To Top
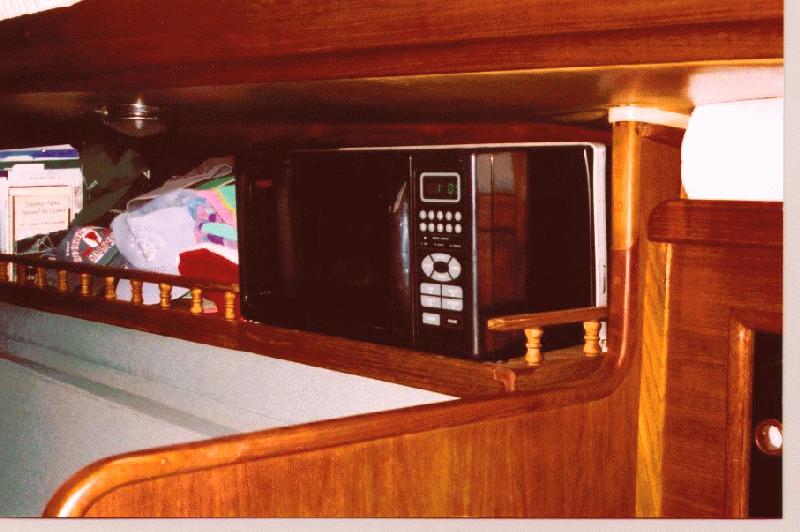
Microwave Placement
A number of boats have put microwaves aboard. Most are only used when attached to shore power. A typical location is the aft end of the starboard upper bunk. Here's a description of Don Henderson's installation on Kindred Spirits, and a picture of Harry Farrell's aboard Pacific High.
There have been a number of our group that have focused on Microwave
locations/installations. I believe most were relating to post 1978
Islanders, with the six bed configuration and an extensive “bin” over the
starboard settee.
“Kindred Spirits” is the older 1976 configuration with the bunk beds on the
starboard side. Since the “upper berth” is never used, I decided to use the
space (originally) for a bookshelf -- and more recently, expanded the shelf
space to accommodate a Microwave. (See pictures). The back of the settee
still swings up to allow for utilization of the lower bunk.
Biggest challenge was to find a Micro unit that would fit, given the
headliner clearance. After considerable shopping, I found that the “low
cost” units available at COSTCO, Sears, et.al were too big. Finally
purchase an ORIGO (made in Sweden, sold by West Marine) that was “just
right”. After building the “shelf” unit, the Microwave was secured with an
aluminum “band” that encompases the unit from forward to aft. The
“fiddles” used for the shelf were from W Marina (stock stuff). While this
is a 110 V unit, it will operate on an Inverter when shore power not
available. Total cost (no labor -- I’m free): Shelf configuration (4x8 ft
slab of Marine 3/4 in. Plywood; teak facings etc, around $150 -- Origo
Micowe around $130).
Don Henderson
“Kindred Spirits”
Kindred Spirits |
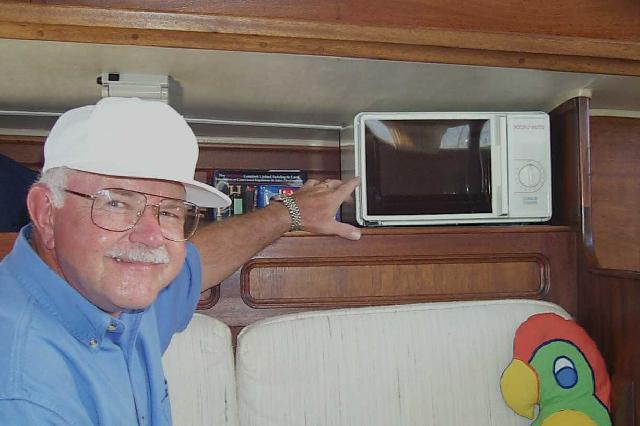
Pacific High |
Go To Top
Alcohol Stove Pressure
Ever get tired of running out of alcohol pressure on a rainy day, when guests are sitting on the cockpit locker, or the other watch is fighting a spinnaker death roll? Here's a way that the galley slave can keep on cookin' without disturbing a swab on deck.
The solution is to put a pressure gauge and air pump switch down below. The key part is a 12 volt air pump (the kind they sell for cars and inflating footballs). We got this one for $15 at Target. Cut off the cigarette lighter plug and wire it into a push-button switch to get 12 volts. The hose end has a fitting for a tire valve stem - just like the one on your alcohol tank. The only problem is that if left permanently on the valve stem, the vale is always compressed and there is a slow leak to let the pressure back out. Thus a small needle valve is added to the system. The last part is a gauge to read the pressure below. The gauge and needle valve are connected to the tank with 1/4 inch copper tubing. The whole setup cost about $35.
The first picture is how it looks below mounted on the aft wall of the galley behind the sink. The second picture is the pump and piping viewed looking forward into the cockpit locker.
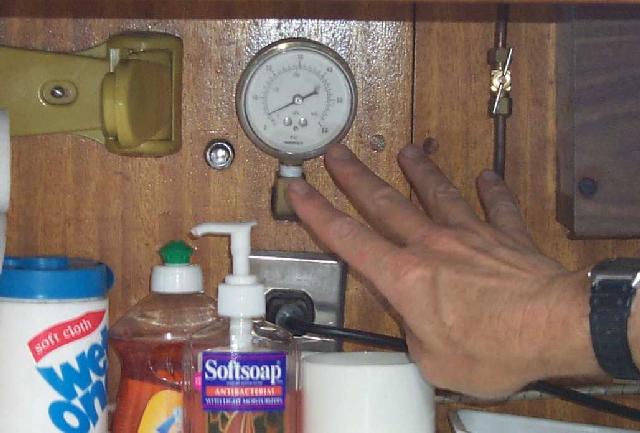
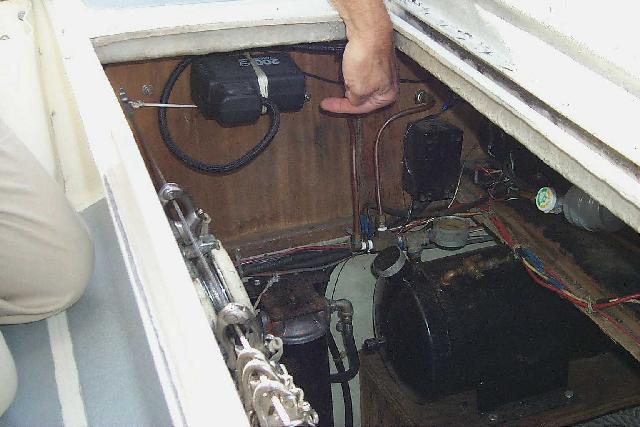
Click Pics for full screen view.
Go To Top
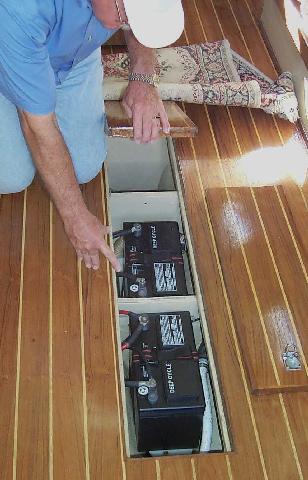
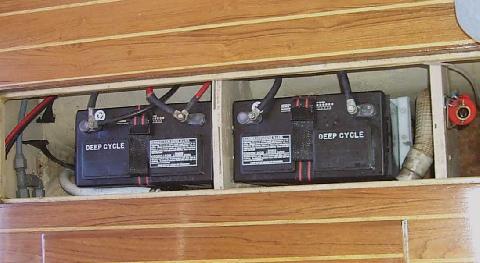
Battery Placement
Here's another place to tuck those batteries - it gets them really low where they will do double duty for juice and stability. Thanks to Harry Farrell aboard Pacific High.
Go To Top
Stbd. Upper Bunk
To Kenny Dykes, ThisSide@aol.com
I'm not sure of all your questions, but we've got a '73, with the port bunk in the main cabin folding out into a "double" bunk. Back around 1980 I replaced the metal legs that came on the fold out section with wood which made fewer holes in the bottom of the cushion.
Also, the Starboard setee back folds up to create an upper and lower bunk situation. If you can stand the "ham", here are pictures of it, the piano hinge, and the leg which holds it up. There is an identical leg at each end.
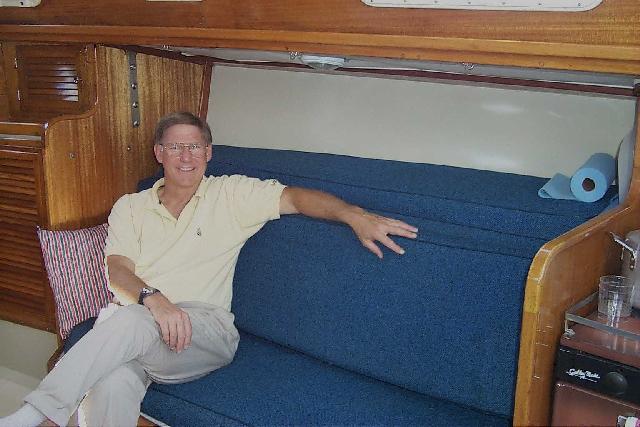
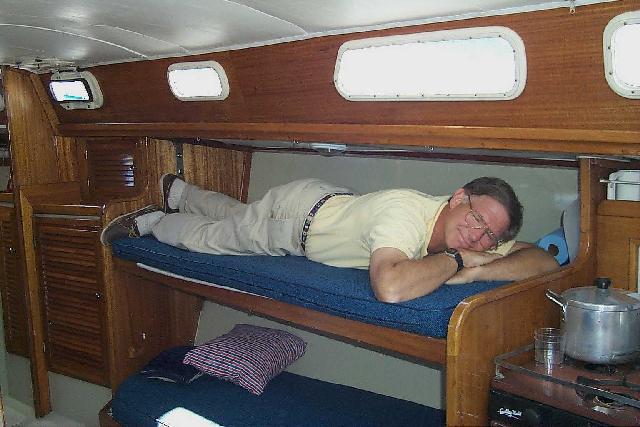
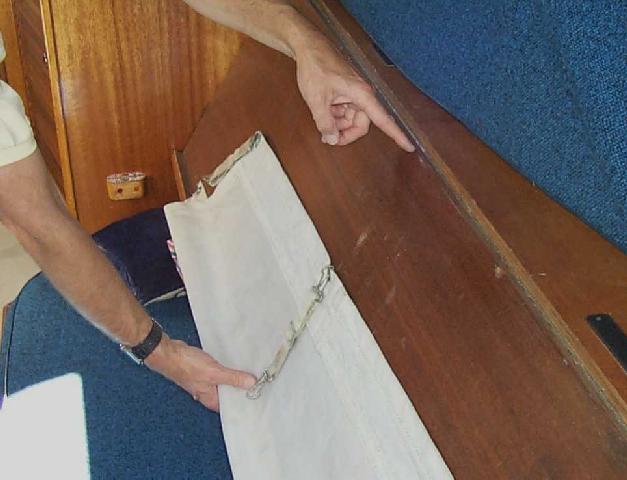
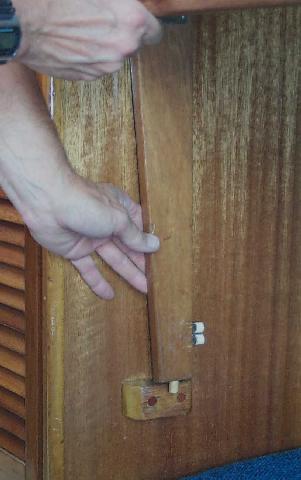
(Click pics for full size image.)
Finally, I have a head door with a piano hinge.
Rick
Go To Top
Original Owner's Manual
07/23/98 09:48:00 PM GMT
I just purchased a 1978 Islander 36. I wonder if you have any idea where I
can get a copy of the boats manual. The only thing that came with the boat
is the Perkins Engine manual. I am a new sailor and not familiar with the
boat's systems.
Thanks for your help, Ron Taylor, Ron.Taylor@wiley.com
Ron,
Congratulations on your new Islander. I hope you will have many years of pleasure with her.
Past Commodore, Membership Chairman and (unofficial) historian Skipper Wall has been the keeper of a copy of the original manual and also has some sets of line drawings and the like. He will send you a copy for a nominal price, contact him at: nvsnowflower@cs.com
Go To Top
Misc.
JoeMasella@aol.com
Date: 01/24/98 12:30:34 PM
Subject: Islander 36 Association
I have not received any newsletters other than one that was sent
with my membership information. How often are they published? Can you send any
back issues? (Newsletters are published 4-5 times per year, but back issues are a little hard to come by.)
Lastly, do you know if anyone in the club has any technical data on the
boat? I'm not sure that I have the ideal prop on my boat and any accurate data
that I can give the prop shop will save me a lot of trial and error in
selecting the right wheel. Besides, I'd love to get a set of plans for the
boat for decorative as well as pratical reasons. (Racers tend to use folding props; cruisers fixed 3-blade props, and all are different with different engines!) (Contact Membership Chairman Skipper Wall for design data – nvsnowflower@cs.com)
Smooth Sailing!
Joe Masella
Go To Top
"Checking for Leaks"
1/12/99 04:14:33 AM GMT
Thought you might get a charge out of this.
FOG is of course, (Islander) Freeport Owners Group
Brian Jacobs, Jake2124@aol.com
Okay, Dick and other Fogers. It appears that ole Ferd will have to share
his patented (and guaranteed to work sometimes to some extent) method of
tracking down the heinous leak on boats. It does involve some work but
that is nothing for a good vintage sailboat owner and, besides, it
builds character:
(1)Dog all topside hatches down. Close all ports.
(2) Fill portable cooler with beer. Wait for beer to become cold, pop
top, take sip and with cooler in one hand and beer in the other exit
main saloon (yes, guys it really IS properly a "saloon") through
companionway to cockpit. Put cooler down, Finish hand beer.
(3) Having previously acquired several rolls of 2"wide QUALITY masking
tape...tape EVERY opening to the boat...every cockpit hatch,
companionway...even tape over instruments, etc. Remove every solar type
vent and tape over opening. Don't forget anchor locker. Pay particular
attention around sliding companionway hatch and door. Object is to make
boat as close to airtight as possible.
(4) Remove both dorade type deck scoops. Tape ONE up. Get another beer.
(5) Beg borrow or buy am ELECTRIC leaf blower of at least 12 amps
rating. Remove blower tube leaving a stub-nose blower. With duct tape
(for strength) tape blower in such a manner as for it to blow down vent.
Grab a beer.
(6) Untape companionway and retrieve the extension cord you now realize
you will need. Yup...beer time.
(7) Retape companionway. Plug in blower.
(8) Unplug blower, untape companion way and retrieve DOVE detergent from
galley. Retape companionway. Hummm.... a beer might hit the spot.
(9) Untape cockpit hatch and retrieve bucket. Retape cockpit hatch.
(10) Mix water and dove into solution (add DOVE last...so not to have
all bubbles.)
(11) NOW, turn on blower and with a mop (you know the drill about the
cockpit hatch...) swab soap ALL over. Do it for a while. Pay particular
attention to BOTH sides of the teak toe rails AND the screws and "S"
joints. You will be amazed at all the bubbles which appear. They
represent leaks. MARK THEM. You WILL forget at least TWO! Consider using
empty beer cans to mark the big bubbles.
(12) Go ahead and get the deck brush and clean the deck while you are at
it. Might as well. A clean ship is a happy ship. Draw one!
(13) Grab a beer, hose all soap residue off and sit down and figure out
how the hell you are going to plug all those leaks!
(14) OPTIONAL: Switch to brown whisky and don't worry about them.
But seriously, group, this has worked twice for me in finding a pesky
leak. Once in the F-36 and once before in the 34' er I had before
this.
Good luck Dick.
Ferd
Go To Top
Pressure Water Systems
Tuesday, November 03, 1998 10:01 AM
I am living aboard my Islander 36 in Port Townsend, WA. I'm from So. Cal originally. I've been living aboard for about five years now but it's much cooler here. I've installed a Dickinson diesel heater, and for the first time, I'm missing having a pressure hot water system and am making it my winter project.
I'm trying to decide on a conventional or instant water heater. (I have propane aboard now) Any suggestions from anyone with systems on board? What about the size of the heater. Is 6 gallons enough? I live alone here.
I have owned this boat since 1982. It's my first boat and I have no intentions of moving up or selling her. I've raced, crused (sic) and lived aboard successfully. These are great all around boats.
Lawrence Hillman, lhillman@olypen.com
Lawrence,
Many of the boats have a 5-6 gallon tank mounted, or rather "hung", beneath the cockpit floor, about directly over the prop shaft stuffing box. The typical rig has the engine cooling water circulate through it to heat water while under power (or charging batteries), and also a 110 volt heating element which works any time the boat is plugged in to shore power. That would seem to suit your situation well. About the only drawback is that hot water gets to the galley sink quickly, but takes a while, and uses a bit of water, to get hot water to the head. I'm assuming you're tied to a dock so water use should not be a big problem. We find that if running under engine for more than 30 minutes, the water stays warm even overnight. You might check your favorite marine catalog for units that fit this description.
Like Gary, mine is a 1973 vintage, and though showing some rust, it keeps on working for the 20 years I've had the boat!
Rick
Go To Top
CNG Availability
11/03/98 04:42:02 PM GMT
Well, it's been 4 years since I needed to refill my CNG tanks for cooking (The wonders of the microwave oven), and the place I had them filled last time is no longer there. Does anyone still sell CNG? Is there a place on the west side of the bay?
Thanks, Brian Jacobs
Replies:
Skipper Wall & Bob Englehart - Svensen's in Alameda carries CNG
Steve Schneider - My source for CNG is the gas dock in Sausalito, near West Marine and next to Caruso's. Accessible by car or boat. They have exchange cylinders for $16.00
plus tax. If you do not have the little brass fill cap with your existing
cylinder, it costs an additional $5.00. Phone is 415-332-3500. Check it out.
Mike Reed, Bellingham, WA - CNG is available in the Seattle/Puget Sound area for those of you who are interested. Sure Marine in Seattle is a supplier of not only CNG refills
but also most, if not all, of the parts and accessories you may need for
your stove/heaters. They're a great source of info, parts and supplies for
other fuels as well. CNG is also available in Friday Harbor, Anacortes and
La Conner. I use CNG for my stove/oven as well as for a Paloma water heater and am
very happy with it.
Its much harder to find CNG for marine use in Canada even though they use
it in cars, trucks and busses.
Frosty Foster - Can't be of much help with the Bay Area, but if anybody on the list sails on
Newport Bay, CNG exchanges are available at Hill's Chevron, next to the Pavillion.
Joe Thon - In the Rhode Island area there are still several places selling CNG. It may be
somewhat of a trip from the Frisco area, but there is some great sailing here
in the summer months. Has anyone investigated the possibility of simply
converting the current burner elements over to LPG jetted units? This change
would allow us to continue with the same stove/oven, by changing out the
burners, lines, and tanks, then adding a LPG solenoid.
Paul Johnson, Alaska - While in the Seattle area, I switched CNG bottles with SafeGas. I now own my own bottles, have all the testing done, and pay 5 bucks per refill at a place that sells CNG to motor vehicles here in Anchorage. I've had this good deal for over ten years. Hope they never go out of business.
Go To Top
Window Curtains
2/21/02 From Gary Salvo
In 1996 I was working on the interior of our boat and had occasion to
replace the rusted clips that hold the drapery tracks over and under the
windows. After much research I found a supplier in Newport Beach, CA and
ordered them. I filed the receipt in my usual efficient manner, and promptly
forgot about it. I just came across the receipt and thought this would be
good info to share. I just did a web search on the company and it seems to
still be in business.
Amtex Mfg & Supply Co.
1760 Monrovia Ave. #C
Newport Beach,CA 92659-2165
Phone (949)645-6060
Update from Jim Joubert 8/20/03:
Items of interest to I-36 owners are:
Mounting (drapery) clips M-123 $0.12 ea
Drapery track #A-101 $1.25 ft.
Sew on tab tape (to attach material to track) $1.40 yd.
(The part number is M-123 Drapery track clips
50 per box
The cost in 1996 was $5.00.)
Go To Top
Horseshoe Buoy
3/3/02 From Gary Salvo
I know at least a few of you own a throwable horseshoe buoy made by
Jim-Buoy, now Cal-June. My cover has rotted away over the years and I need
to order a new cover. The old cover has a zipper in it so I tried to find
just the cover at one of the marine outlets. The new buoy at West Marine
costs $94.99 (deluxe model) in the new catalog, and they don't sell the
cover.
I went to the Jim-Buoy home page and sent them an e-mail asking about the
cover. They replied that I could call them at 818-761-3516 and order from
them directly. The cost for the deluxe cover is $35.00 + shipping.
Hope some of you can use this info.
Gary
Go To Top