Opening Ports
(Opening Windows!)
5/26/07
I contacted Beckson hoping to find a replacement lens for one of opening ports and learned the following:
- The opening ports on our 1984 I-36 were not manufactured by Beckson, but rather were from a company named "Pyhi" (the Pyhi opening ports have 3 dogs, but all Beckson ports have only 2).
- Pyhi was purchased by Bomar, which (amazingly) is still producing the ports.
- Bomar's parent company is Pompanette, and their contact information is:
Pompanette, LLC
P.O. Box 1200
Charlestown, NH 03603
603-826-5791
www.pompanette.com
The replacement lens I needed was a Bomar "Gray Series" 414 clear lens, and its part number was GP907-23.
As always, I hope this helps someone else.
Cliff Cohen
Latitude
cscohen@iconn.net
1/26/04
Mon Ami had bronze portlights installed before we bought her. The portlight spigots would retain water that could result in an unexpected shower if you opened the port before removing the water!
The design of the New Found Metal stainless port allows water to drain from the spigot which eliminates the shower problem. The stainless also looks more modern, so I talked myself into making the change. You can check out New Found Metals on their web site at http://www.newfoundmetals.com
The New Found Metal web page has prices for the ports and teak spacers. Six ports with spacers come in around $1500. Add the cost of shipping 60# from Wash. State, about $60 for caulk and masking tape and $30 for the counterbore tool.
Do it yourself labor is cheap, but it takes some time. The old ports have to be removed, then the holes cut and bored. The Port forward and aft lowers have to be moved to get working room. Some of the bolts bottomed out so had to cut about 1/8" off to get the right length.
Each port must be "dry fit" to make sure all the bolts are the right length and the holes are all lined up properly. Once that is done, you're ready for the messy business of caulking. Plan on lots of paper towels to keep things cleaned up or caulk will soon be all over the boat!
The manufacturer recommends a rubber butel caulking material, which is probably better as far as the mess is concened. I wanted to stick with something I was familiar with so used Boatlife Life Seal, but it IS messy!
Pictures of this installation are representative of what is entailed in making the conversion. The size of the portlights shown (5x12) are different than those needed to replace the original plastic ports. New Found Metals recommends a 4X14 portlight as the replacement size for the I-36. I was locked into the 5x12 size because of the existing openings cut out to install the bronze portlights.
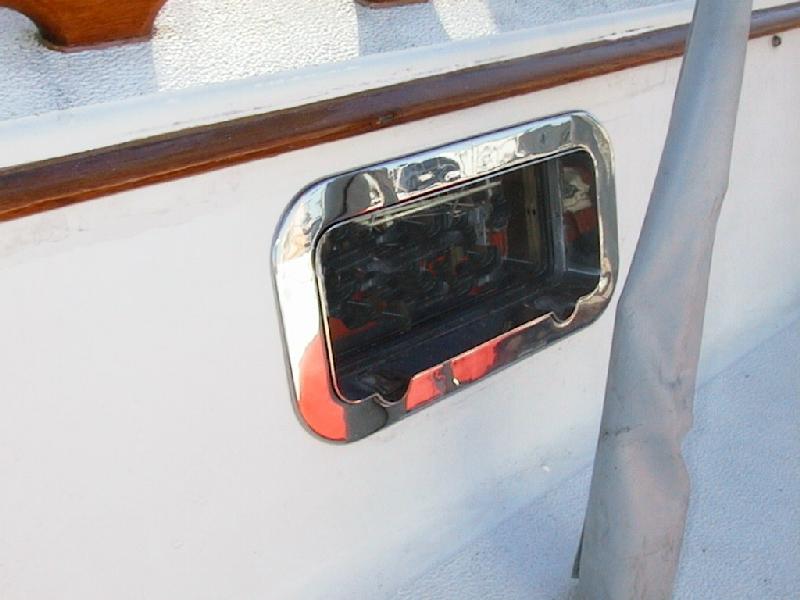
If contemplating this conversion, one decision that needs to be made is whether you want a teak spacer under the portlight or not. The cabin trunk on the I-36 is 5/8" thick. The spigot on the portlight is 1 ½" deep. If you install the portlght without a spacer, the spigot will protrude past the outside trim ring creating an "eyebrow" look. If you elect to use the spacer, the spigot is flush with the outside trim ring. (see pictures) The spacer is an extra $45, but they do look nice in the cabin. (decisions, decisions!)
The portlight comes with a cardboard template that is fairly easy to cut out and tape onto the outside cabin trunk. Mark the opening and bolt hole pattern from the template. You are now ready for the ol' skill saw and electric drill!
The bolt holes are 3/8" but need to be counterbored larger to 11/16" to a depth of ½". The counterbored hole is needed to accommodate the nuts welded onto the backside of the outside trim ring. The procedure sounded complicated when reading the installation instructions, but proved to be no big deal once I obtained the proper tool. (I have a slightly used one for half price if interested!)
The installation instructions furnished with the portlight are pretty good. The pictures should give you an idea of what's involved. If you have any questions, I will be happy to share my limited experience.
Jim Joubert
jwjoub@earthlink.net
Mon Ami
(Click pics to enlarge.)
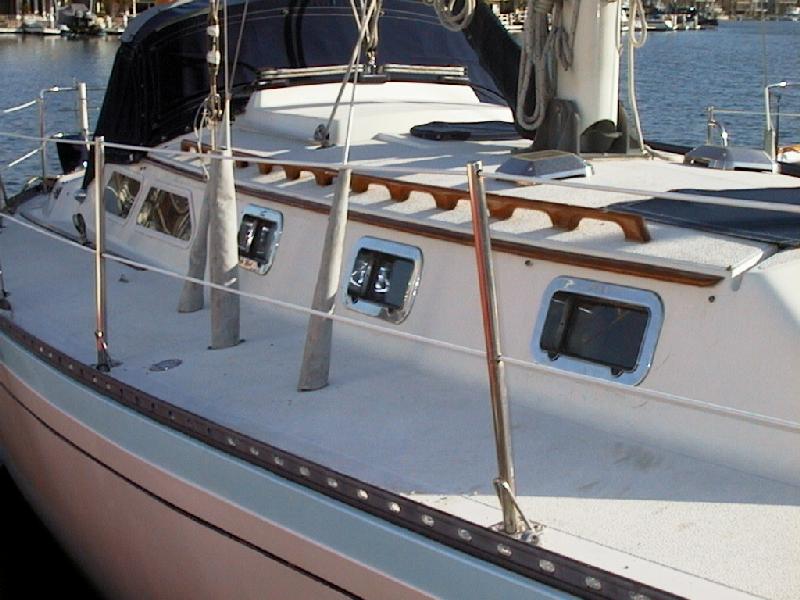
 1. Stainless ports installed from outside.
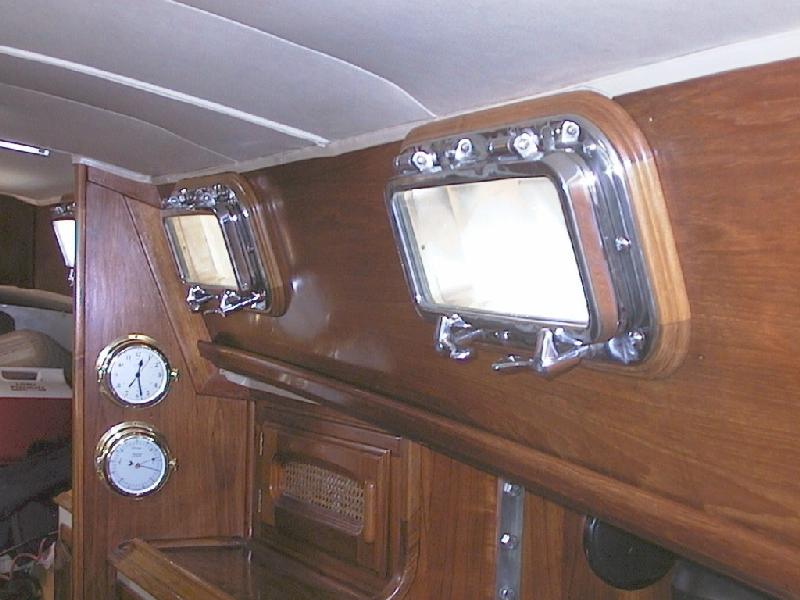
 2. Stainless port inside with teak trim ring.
 3. Port installed without spacer.
 4. Port installed with spacer.
 5. Rough cutout with bolt pattern.
(fortunately, the trim ring will cover previous sins!)
 1. Stainless ports installed from outside.
 2. Stainless port inside with teak trim ring.
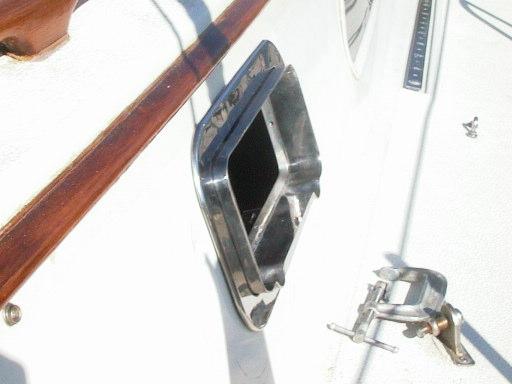 3. Port installed without spacer.
 4. Port installed with spacer.
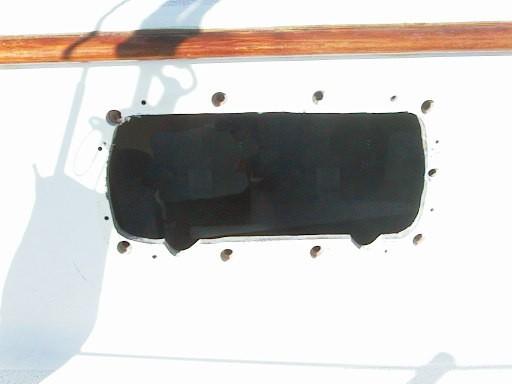 5. Rough cutout with bolt pattern.