Windows - Replacement Tutorial

Here is a November 29, 2020 exchange of emails where Cliff Cohen responds to new owner Fred Manley's request for advice on replacing leaking fixed windows.

Hi Fred,

From what I can see in your photo and based on my experience with both our I-36 and my sister's I-28, the damage and problems you have are the result of failed portlight bedding/sealant. If after your recent heavy rain the veneer beneath the portlights feel wet/damp, they are leaking. If it were me (and it has been me in the past) here is what I would do:

- To properly seal the portlights they have to come out. It highly likely that when you attempt to remove the non-opening lights the plastic frames will be damaged beyond repair (been there, done that). Fortunately, exact replacement windows are available from Mark Plastics (951-735-7705). It would be wise to consider the possibility that the starboard portlights are either also leaking or may be in the near future. Mark will be able to fabricate replacement fixed lights and will either supply you with the correct silicone sealant to use or will tell you exactly what to use. Over the years he has recommended different sealants, depending upon availability. They are professional grade glazing silicone sealants from either Corning or GE - nothing terribly exotic, but not available from either West Marine or most other boating-related vendors.

- Remove your curtains. Be careful not to lose the little square track stoppers. I do not know if they are readily available.

- Remove the curtain tracks. Go easy when you unsnap them from the retaining clips. I had a couple of them break on me (a local marine upholstery/canvas shop had replacements).

- Because of the veneer and headliner damage, I would temporarily remove the solid wood trim/'grab' bar. You will need to carefully take out each of the wood plugs (I have been able to dig them out pretty easily with a small flat blade screwdriver). Once the plugs are out of the way you should find Philips head screws that are reasonably easy to back out. Our trim rail was only held in place by the screws.

- Remove all the screws that hold the interior plastic compression/trim caps on the fixed portlights. Once the screws have been removed the trim caps should come off pretty easily.

- Use a small screwdriver, putty knife, etc. to carefully dig out as much of the old caulking sealant from around the windows (i.e. between the windows and the cabin) that you can. Chances are good that some of the material will be wet.

- Once you have as much of the old caulking out as possible, try carefully pushing the windows outward. If you have received new windows from Mark, don't worry about the window frames cracking/shattering. If you're going to try and reuse the old windows (not recommended) go slow and easy. If the old sealant has completely failed, you're golden. If not, try sliding (carefully) a putty or sheet rock taping knife around the exterior frame edge. If the frame is brittle and is going to break, now is the time.

- Once the windows have been removed, clean every bit of the old caulking/sealant from the cabin edge. You will then be able to see and measure the teak veneer's thickness.

- You should be able to obtain similar veneer from a woodworking supplier like Rockler (https://www.rockler.com/) or a local specialty wood merchant.

- My sister's I-28 had veneer damage similar to yours. On her boat I cut a replacement piece large enough to cover (i.e replace) the damaged area. I temporarily laid the replacement piece over the damaged area and then used a utility knife with a new blade to cut through the old veneer, down to the fiberglass (I used each end of the overlaid replacement piece as straightedges). The important edges are the fore and aft ones that will form the seam with the old veneer. The bottom edge will be covered with the trim rail. The top edge I left over-sized (to be form-fitted with a Dremel tool later).

- I used sharp chisels to carefully remove the damaged wood veneer from the interior cabin top's fiberglass (be very careful at the edges).

- Next, I used West System epoxy (and plenty of clamps) to secure the new veneer to the fiberglass. Once the epoxy was set I used a Dremel to form/contour the veneer to fit the window opening/cutout.

- Temporarily dry-fit the window in the opening. Chances are the opening is much bigger than the window. Remove the window and set it aside.

- At this point I highly recommend mixing up a batch of thickened West System epoxy (I used 406 thickener) and coat the entire cabin edge (try to smooth it as much as possible - the smoother you make it the less sanding you will need to do when it hardens). This step is a pain, but it helps insure that the next time the window sealant fails water intrusion won't again rot the veneer). When the epoxy is set, sand the edge smooth. Make sure it's completely covered (if not, repeat until it is).

- Use a cloth moistened with paint thinner to remove any and all sanding dust from the cabin edge.

- Dry-fit the window (again) in the opening. Center the window in the opening and temporarily secure the window with the interior frame and screws.

- Use plenty of masking tape to neatly mask the exterior of the cabin all the way around the window.

- Remove the window. Generously apply the silicone sealant to the underside of the window's exterior flange. If in doubt, use more!

- Place the caulked window into the frame and press into place.

- Install the interior frame and secure with the screws. Gently tighten the screws down using a modified cylinder-head pattern. You want plenty of sealant oozing out all the way around the outside of the window flange.

- Once the window is securely in place, use your finger to trowel, remove and smooth the sealant that oozes out around the frame (unlike the stuff from the marine supply places, it smooths easily).

- Before the caulking/sealant sets up, remove the masking tape.

- It's possible (if not likely) that Dan is correct and the headliner beneath the windows is shot. Before giving up on it, however, I would try carefully putting it back in place.

- First, remove as many of the rusted staples as possible. You will likely find rusted metal pieces in both the headliner material, the foam lining and the wood cleats. Try to get as much out as possible.

Use an Arrow T50 stapler loaded with the shortest length Monel or stainless steel staples you can find (be sure to use Monel or stainless). Carefully stretch and staple the headliner back into place (I'll keep a good thought that it doesn't tear).

- If all goes well, you will now be ready to reinstall the the trim bar.

- Replace the teak plugs using waterproof wood glue. After the glue sets, I usually put masking tape around the plugs and then griind/contour them into place using coarse grade sandpaper, followed with 150 grit.

- If necessary, lightly hand-sand the entire trim bar.

- I have had excellent results blending the wood color on both the solid and veneer surfaces using Zar's "Teak Natural" oil stain (just be sure to take your cushions and curtains off the boat before you use it - one stray drip and you're done).

- All that should be left to do is to reinstall the curtain rods and curtains.

It's not as bad a job as it sounds. I'm no carpenter and if I can do it anyone can!

Let me know if you have any questions.

Best regards,

Cliff

Latitude
I-36 #657
Branford, CT


On Sunday, November 29, 2020, 06:30:04 PM EST, Fred Manley wrote:

Hi all,

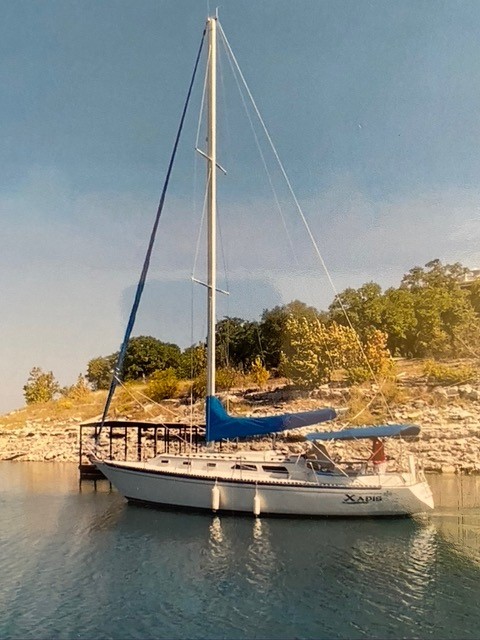
New owner here- Sail #575 in Austin Texas.

I wanted to reach out to those of you, many of whom may already have gone through this exercise.

The survey revealed some prior leaks along the fixed windows along the port side. The prior owner explained he had experienced some leakage some years ago that dampened the ceiling material under the port gunwale and caused some peeling of the teak veneer just below both windows. He said he had not seen any wetness in a number of years, but we just had a slow three-day rain that has resulted in dampness.

Fred Manley 1 (59K)

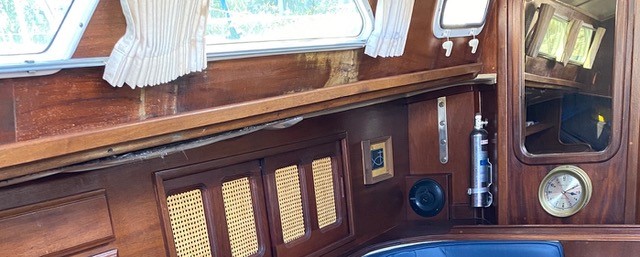
As you can see, the veneer has pulled away and the headliner below the windows has worked its way loose over the years. I have not gotten to this task yet, but a cursory inspection leads me to think the vinyl covering is still viable, but the underlying substrate (marine plywood? some sort of mounting board connects to the horizontal rail and to the gunwale) is in pieces and will have to come out. I think there is a 6 foot run from just ahead of the front fixed window to 1/2 way along the rear one that has been affected.

I have ideas, but want to hear from you veterans before launching into this blindly. My surveyor (a sailor himself) has done some cut-to-fit teak veneer over sanded and repaired cabin sections on his boat, but I want to get your suggestions on repairing the underlying problem: laying back the headliner, hosing down the exterior to try to pinpoint the leak (s), sealing with, perhaps clear acrylic caulk, mounting some infrastructure onto which I can re-attach the headliner.

I am keen to eliminate as many sources of mold and mildew as I can, so this will be part cosmetic, but mostly structural integrity-based.

I am open to learn what you have experienced. I so much appreciate any inputs you may care to provide. Thanks for your help.

Cheers,

Fred & Chris Manley

Fred Manley 2 (86K)


Return to Maintenance Menu
Return to Main Menu